Installing Windows to a Virtual Machine
Just as a brief introduction to VMs and such: A virtual machine emulates a computer system. You have what is known as a hypervisor on your computer, which is either VirtualBox, or VMware Workstation. These programs are both considered Type-2 hypervisors. Type-2 hypervisors are installed on top of an existing operating system and have much better hardware support due to using software-based emulation.
Got it? Let's go.
For this tutorial, I will be using VMware Workstation 10. The instructions should be about the same for VirtualBox, but you should keep this in mind.
If you need to jump to a specific section, use these buttons:
Preparing the Virtual Machine
Getting the obvious out of the way, start your hypervisor. In this case, for me it is VMware Workstation 10.
So, on VMware, this is normally the screen you first see. If you don't see it, go to the top and click Tabs > Go to Home Tab.
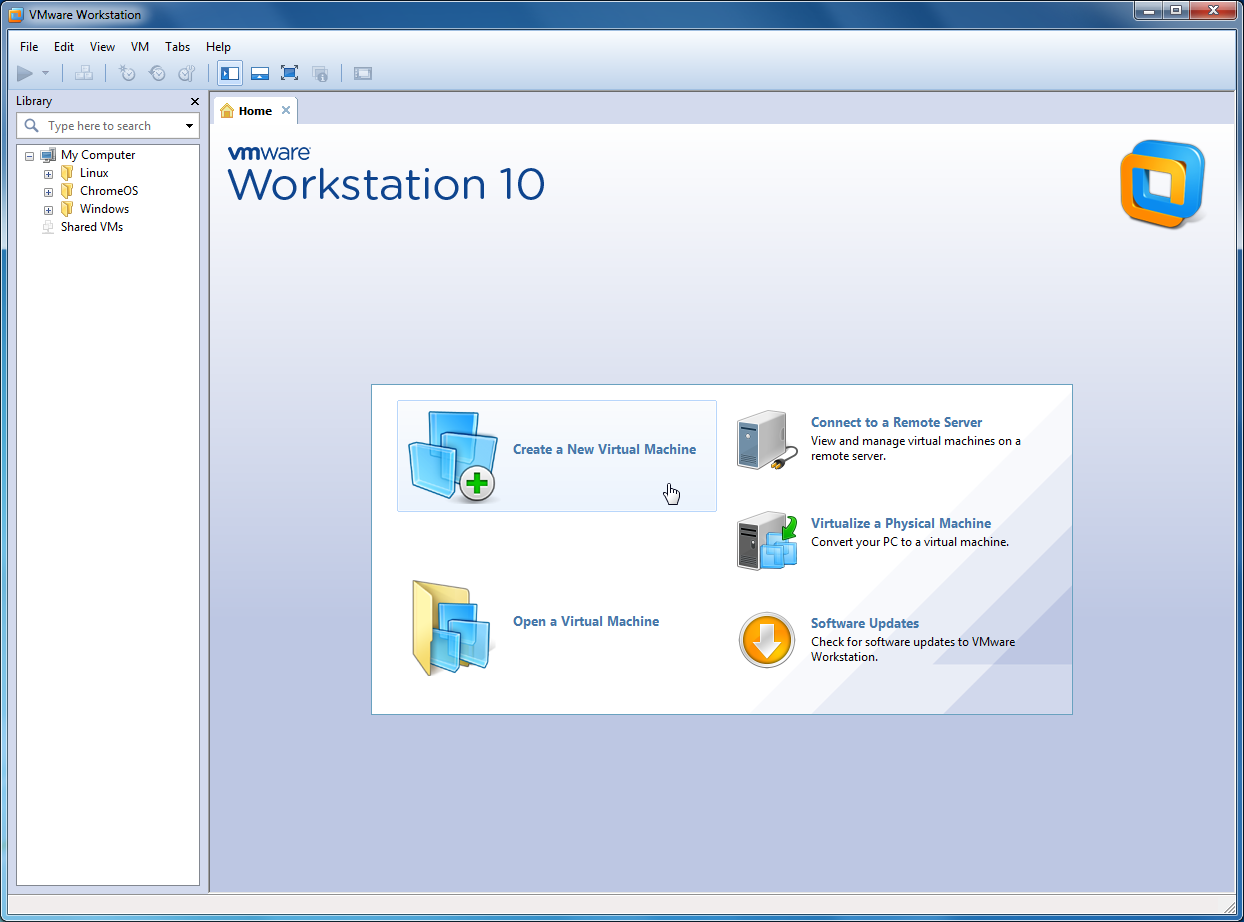
Click Create a New Virtual Machine. You will get a wizard that looks like this:
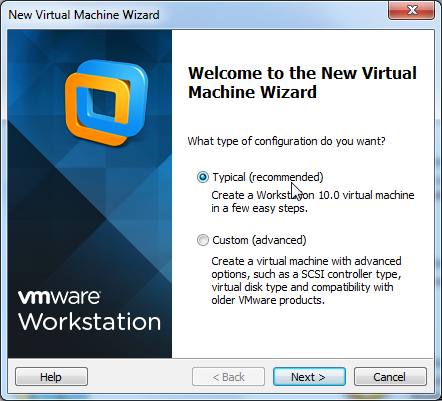
You should click Typical, as it generally makes everything a lot easier.
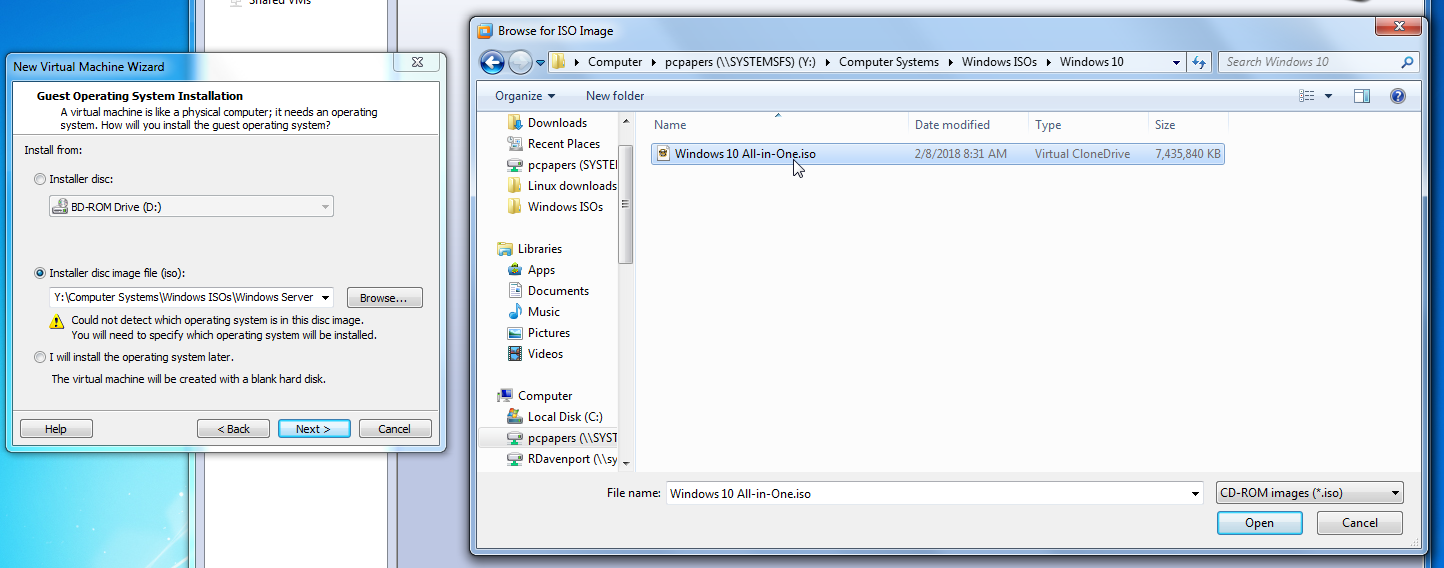
You will be taken to another wizard asking how you will install the new operating system. You should click Installer disc image file (iso), and click Browse... and select the ISO you are going to use.
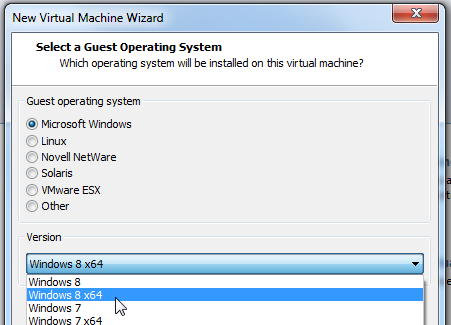
The next page will ask you what operating system this ISO is, in the event that VMware doesn't recognize the OS. A good practice is to pick the closest match to the OS. For example, for Windows 10, I picked Windows 8 x64.
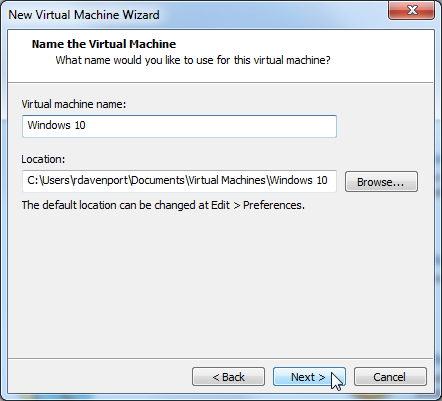
You will then be prompted to name the virtual machine and pick a location.
You can name your VM whatever you want and place it wherever you want, but in the event of installing a VM for everyone
on the computer to use, you should place it in
C:\Virtual Machines.
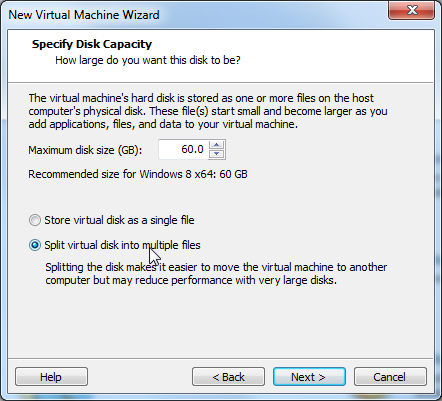
Now you'll be asked for the virtual disk size. It's normally fine to keep this default, but to make creating the virtual machine quicker, you should always make sure you have Split virtual disk into multiple files selected.
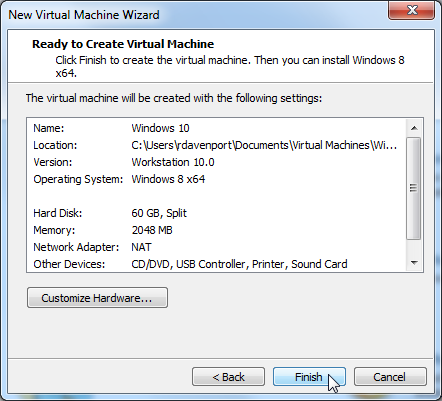
Almost done! If you need more RAM you can click Customize Hardware... but otherwise just click Finish and let VMware create the virtual machine. You're done with making the VM (congrats, by the way!), but now you need to install Windows. The next section explains how you do this.
Installing Windows in the Virtual Machine
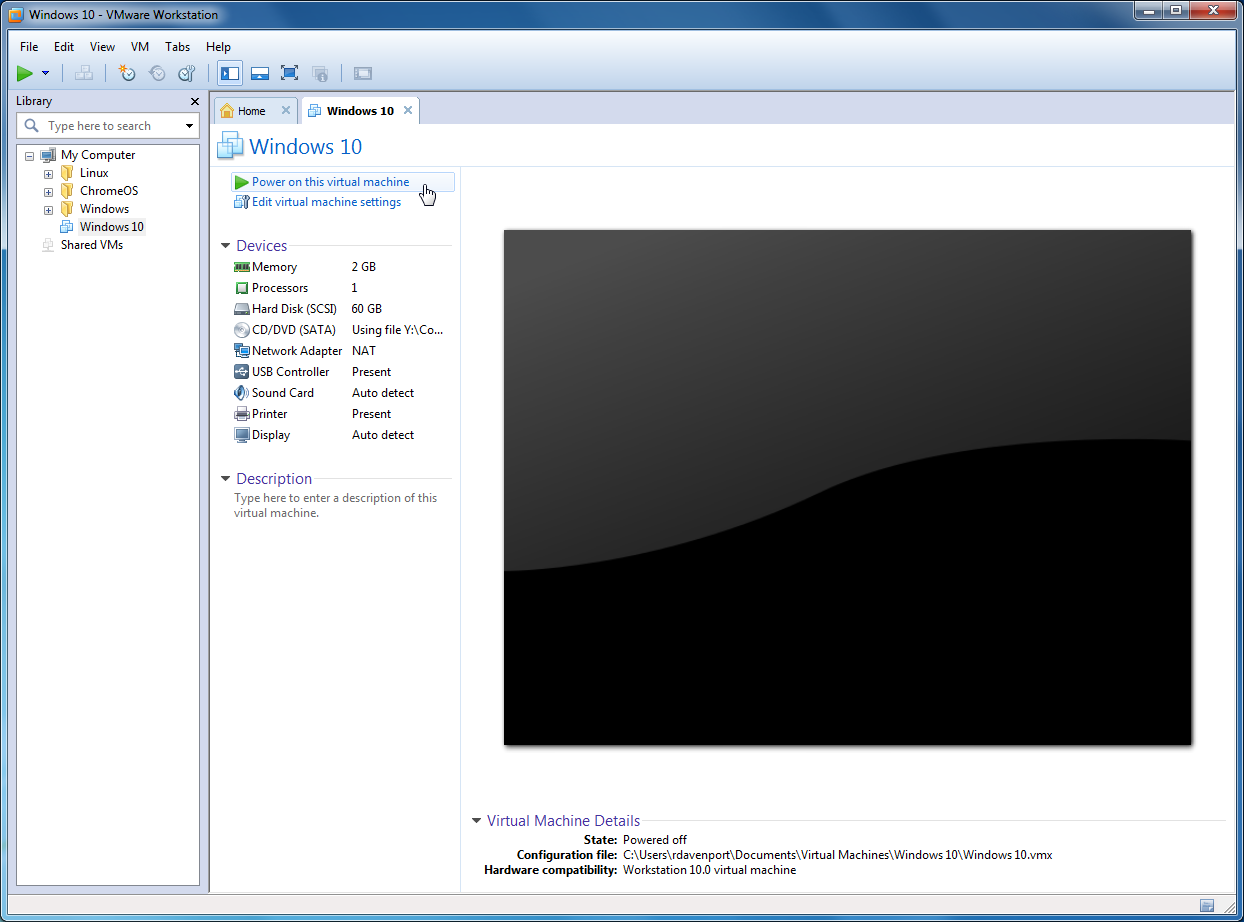
So, you should now be left with this window after the first section. Click Power on this virtual machine.
Let Windows boot the installer. If you've been following this tutorial exactly as I've done it, on the Windows 10 boot loader click the 64-bit option.
It's time to give you a friendly reminder about newer operating systems, such as the one I am installing! There are no product keys for Windows XP and later. Windows 10 allows you to skip the product key entry.
You should also do a custom install in a VM. Don't try to upgrade - there is no existing operating system.
If you need a product key for Windows 95-ME, here is a huge list of them.
Partitioning
So, some people don't seem to exactly understand partitioning very well. It's really easy in a VM, don't worry.
On the custom install screen, it will ask you where you want to install Windows. Select the Unallocated Space and click New.
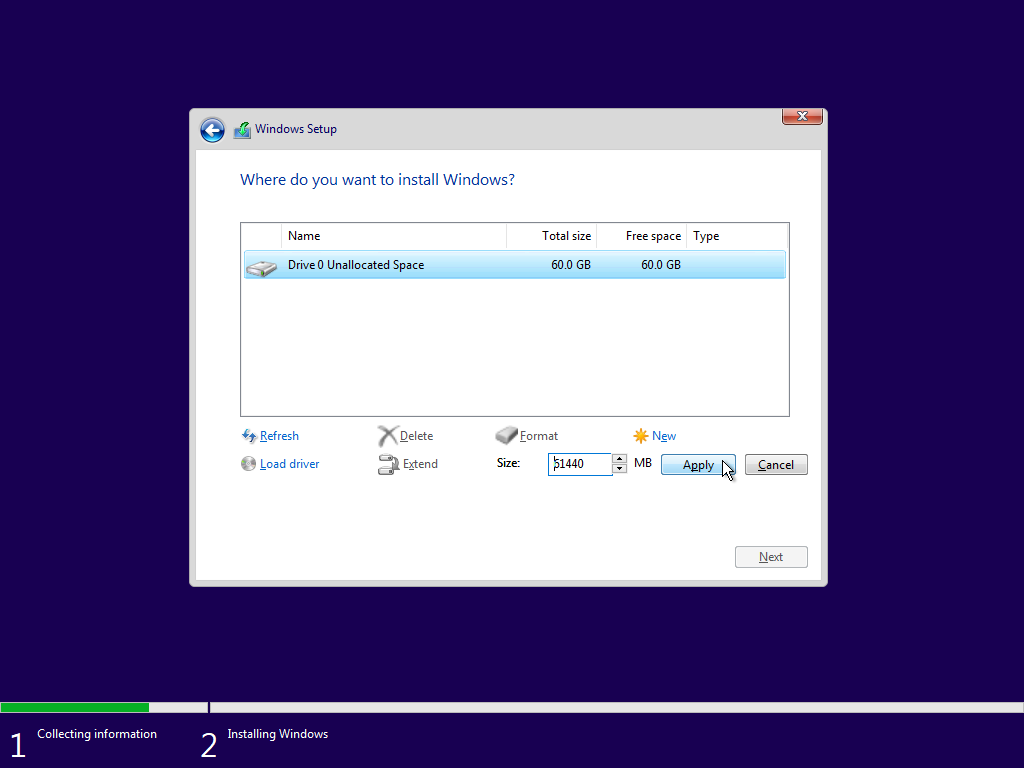
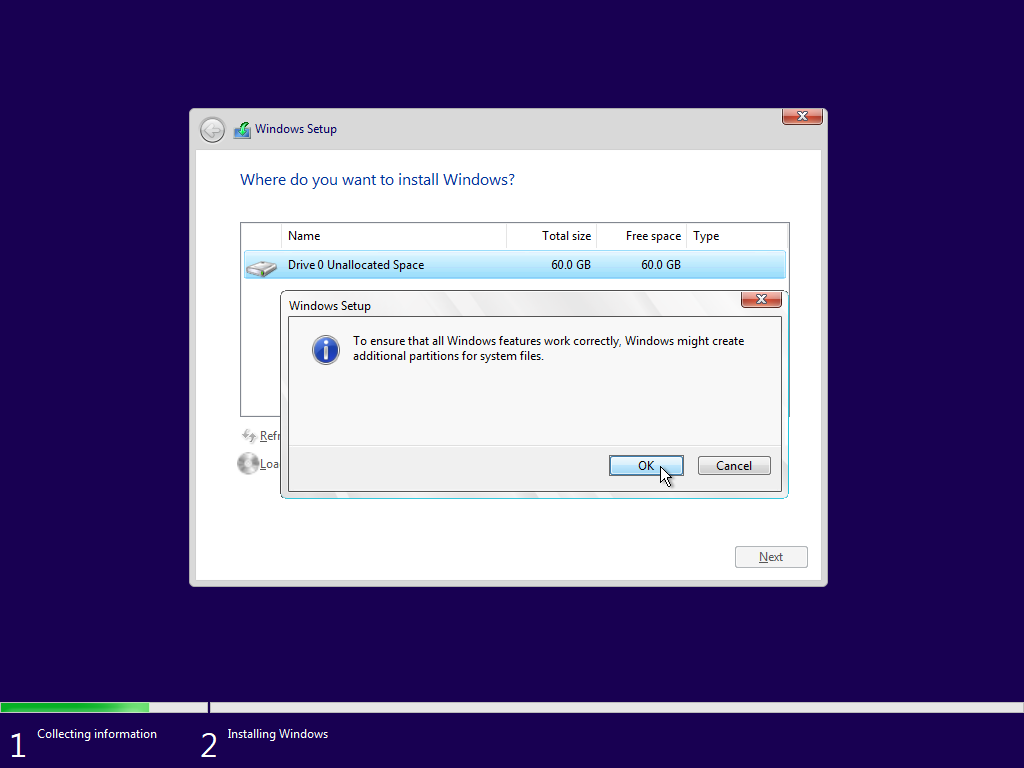
You can just click Apply on this, and click OK on the next dialog box.
The new partition will automatically be selected, just hit Next.
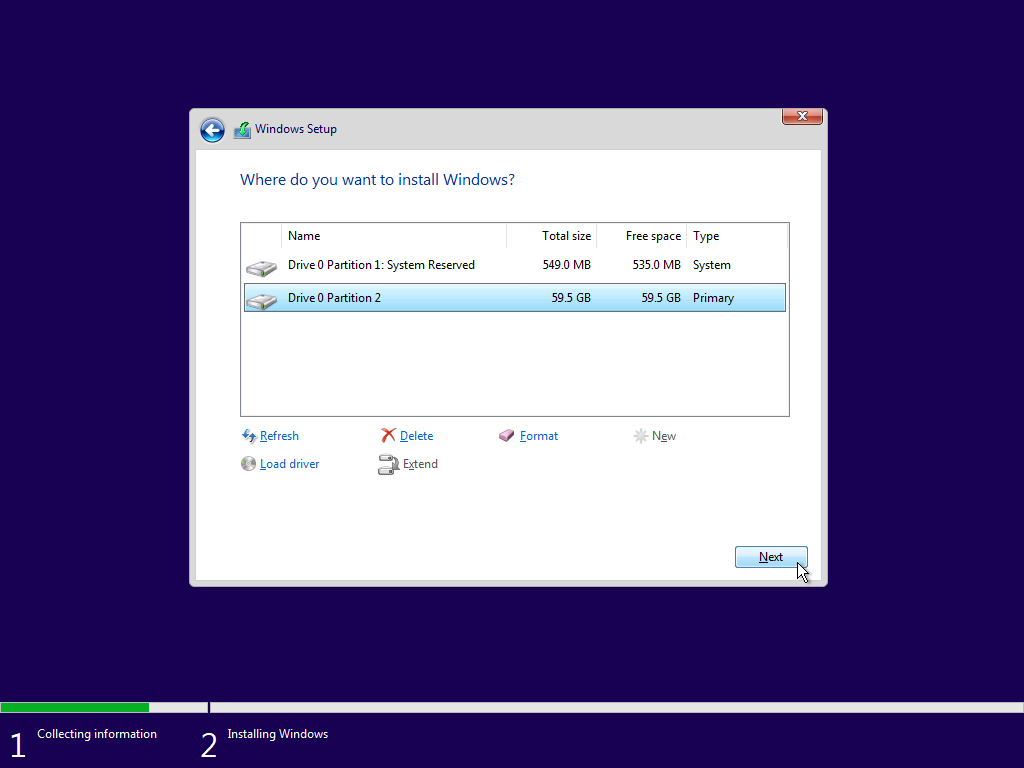
Now, if you did everything right, Windows should be installing. You can do other stuff while you do this, or you can just watch Windows install. Whatever you wanna do. I can't control you.
User Setup
If you're installing this for everyone on the computer to use, it's best to use
student for both the username and password.
If you're asked for a password hint, just type
you or something like that. Recent Windows versions don't let you put the password as your password hint.
Once Windows boots into it's setup, just go through it and answer all it's questions. You'll be done eventually, and you'll eventually get here.
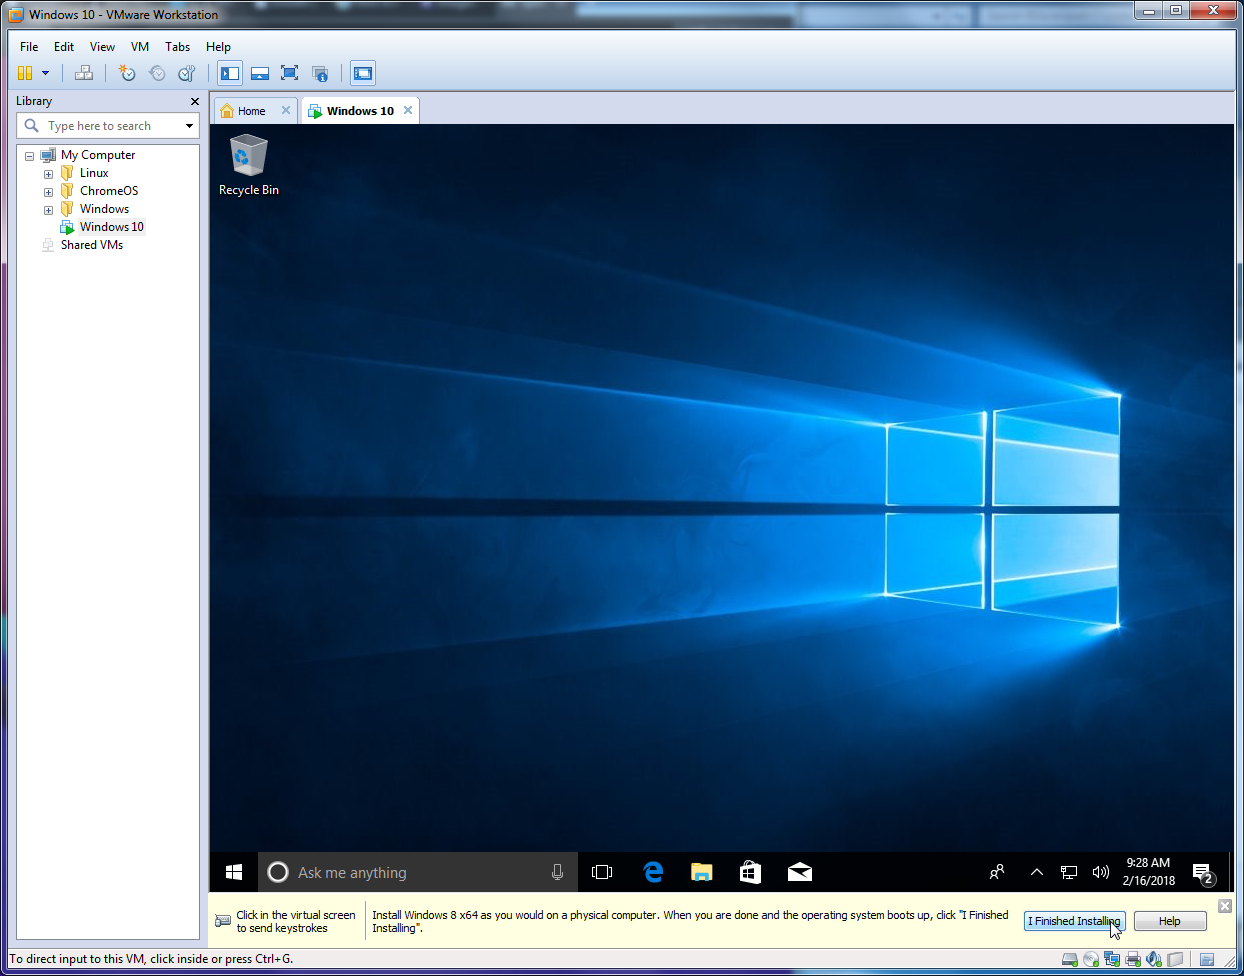
Just click I Finished Installing and you're done!
Installing VMware Tools
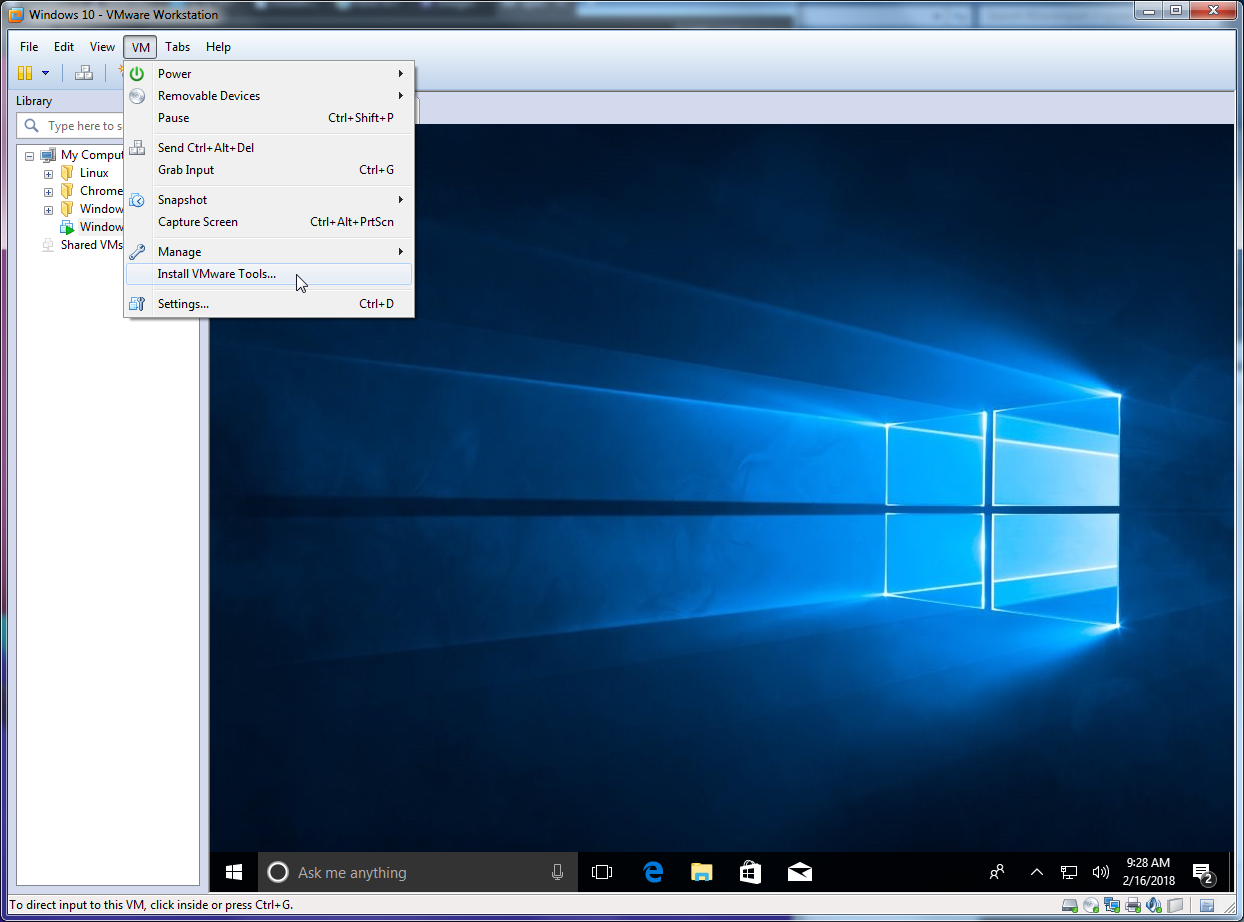
To speed up your VM, it's highly recommended to install VMware Tools or the guest additions in whatever hypervisor you're using.
To start the VMware Tools installation, go to VM > Install VMware Tools...
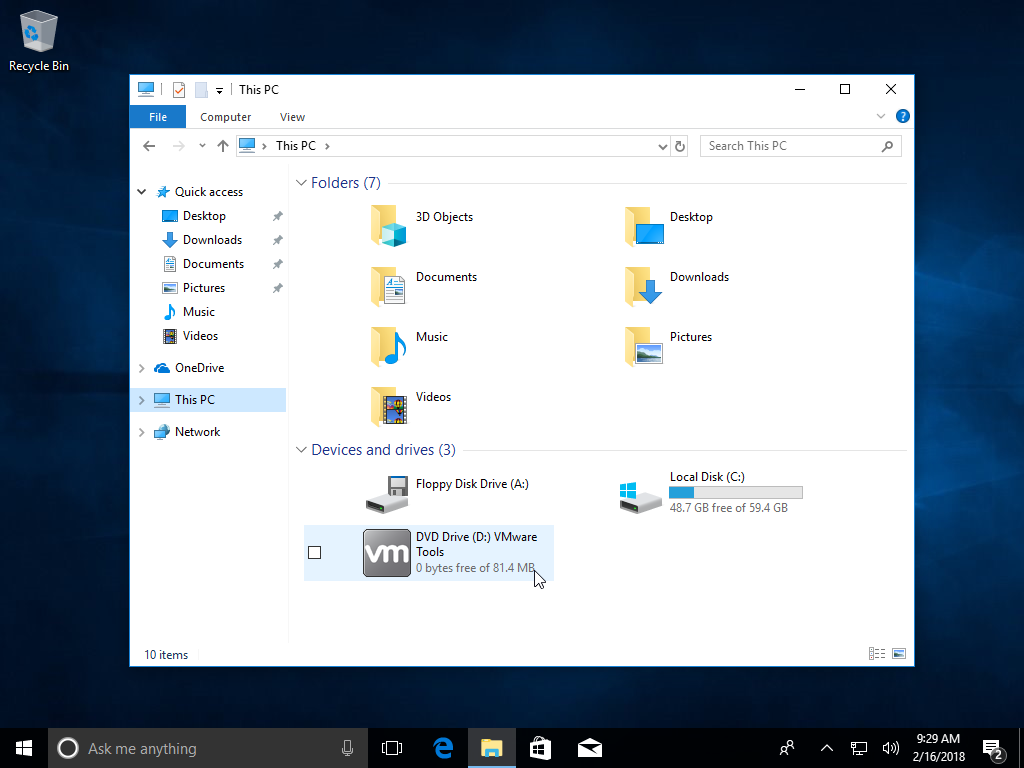
Go to the File Explorer on your VM and find the virtual CD drive. Double click on the CD drive.
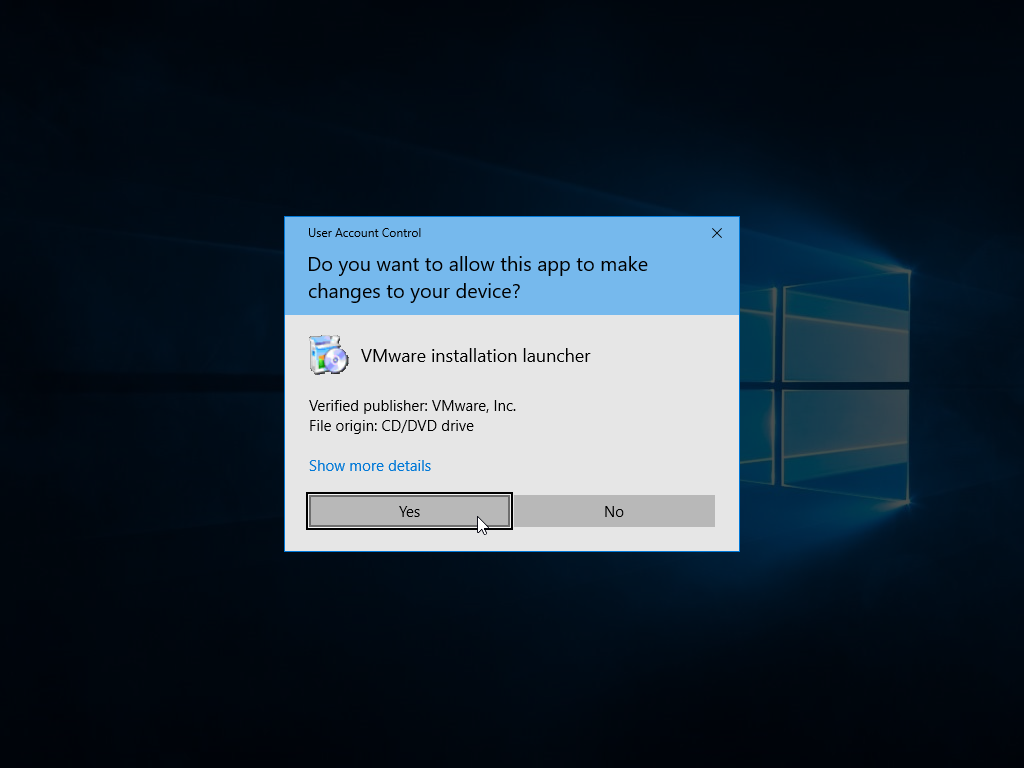
UAC might prompt you, just click Yes.
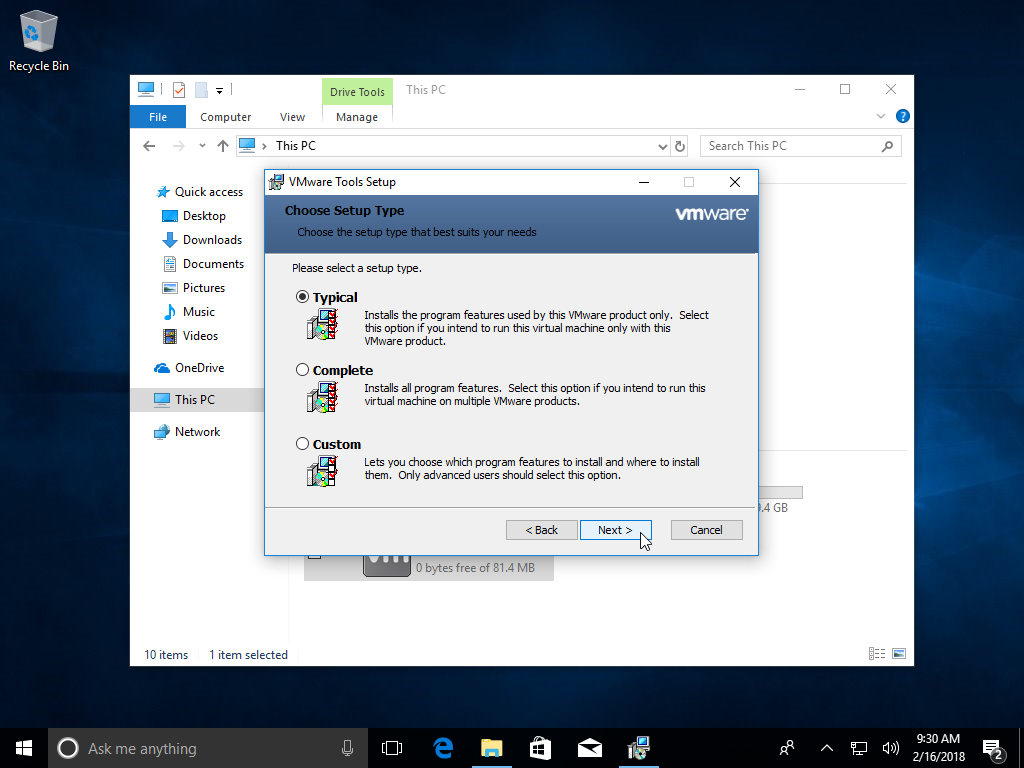
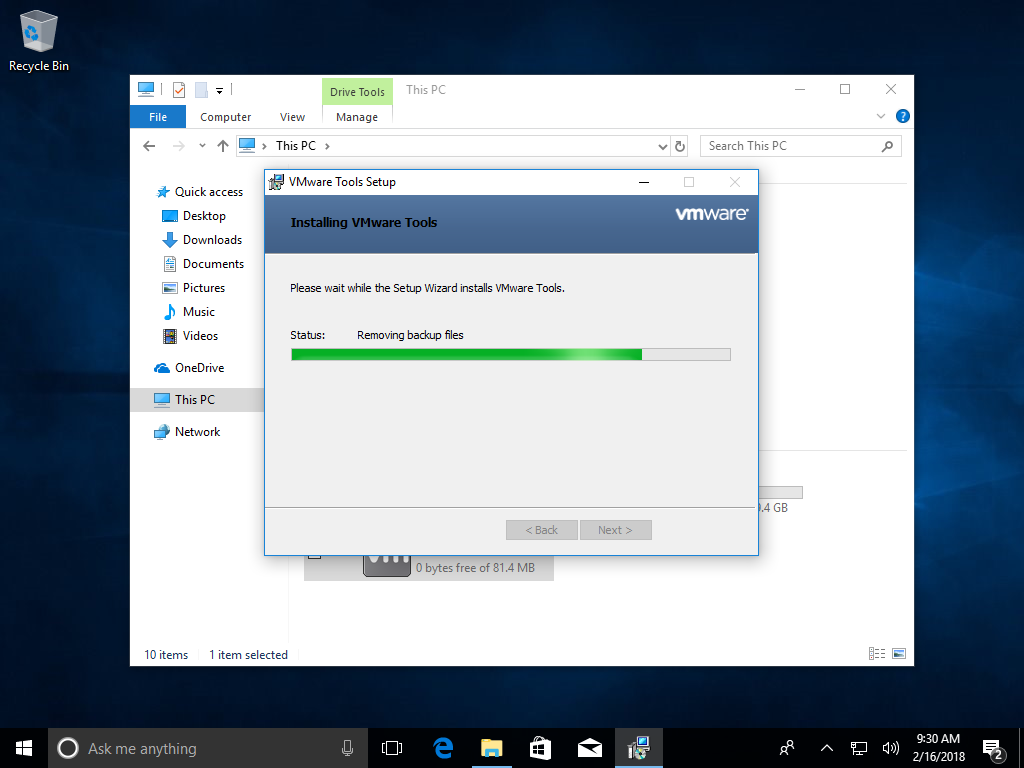
Wait for the installation to boot up, click Next, and just keep it on Typical and click Next. Keep clicking Next until the installation starts.
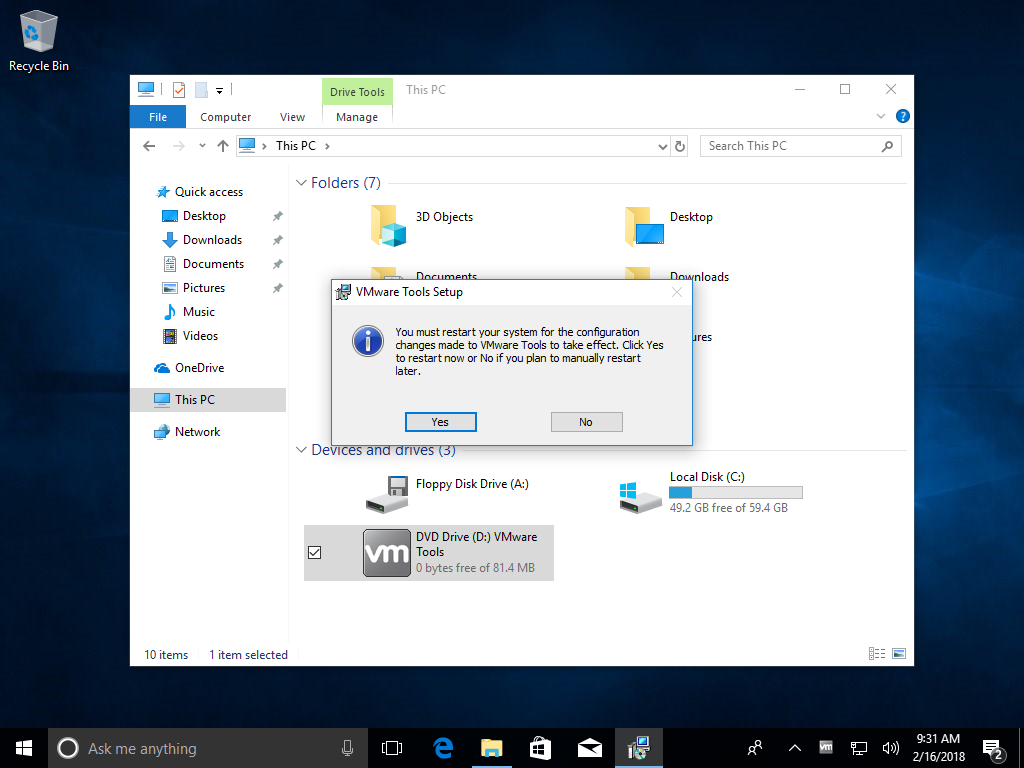
Once you get this prompt, click Yes and allow your virtual machine to reboot. This is required as VMware installs specific drivers which relates to video and such.
And now, on reboot your VM should perform faster and be able to resize dynamically. You're done!
Troubleshooting
You're bound to run into some issues, so I've tried to compile the issues I've seen with VMware.
VMware Tools isn't working, the resolution won't resize!
First, try this: Go to
View >
Fit Guest Now.
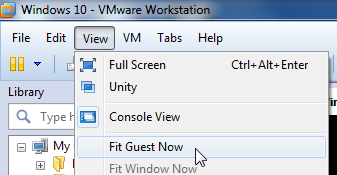
This
should resize the machine's resolution, but in the case that it doesn't, please try
reinstalling VMware Tools.
The operation on file "..." failed.
This is an issue I actually ran into personally.
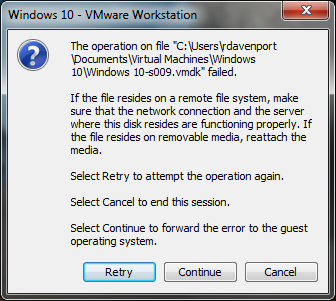
Before we start, keep note of that path that is mentioned. You'll need it.
First, click Cancel. This will shut down the virtual machine. Then, close out of VMware Workstation.
Now, press Windows key + R . Type cmd and press Enter .
Type cd "C:\Program Files (x86)\VMware\VMware Workstation".
Now, remember how I said to keep note of that path? You're gonna need it now. Since you have split the virtual disk into
multiple files, remove the
-sXXX part.
For me, I would type vmware-vdiskmanager -R "C:\Users\rdavenport\Documents\Virtual Machines\Windows 10\Windows 10.vmdk".
Press Enter and allow it to repair.
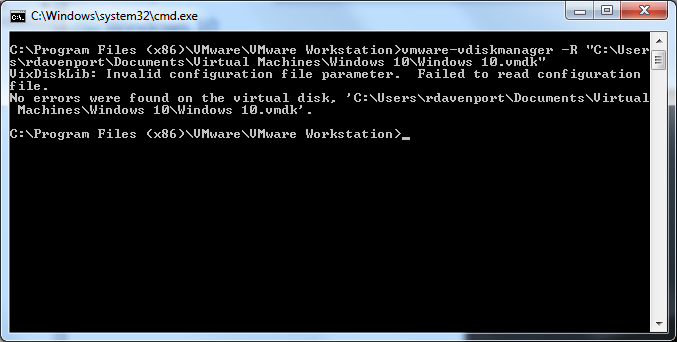
If you get
VixDiskLib: Invalid configuration file parameter. Failed to read configuration file. you're fine. Nothing is broken.
That should be all. Open VMware and try using your VM again.
The end!
Congratulations! You installed Windows in a virtual machine.
If you run into problems, the troubleshooting section is the place to go.